Building a blog using Astro

Why a new blog
In my last blog, I noted that I would be moving from Webflow to Substack. I listed out several reasons why I’m switching, and I even copied and pasted 68 articles into Substack.
But, after I posted my Substack article on Twitter, my tweet engagement was extremely low. And the social preview didn’t show up. The image below was just an image. It wasn’t linked to my Substack post.

Confused, I searched online to understand why. And that was when I learned that:
Elon does not like Substack (link). So Twitter doesn’t display any Substack social previews.
I’m not sure if my low tweet engagement was because of Substack. But regardless, I needed an alternative. At the time, I thought of two alternatives:
- Add a domain to my substack blog + pay $50 to do so
- Build my own blog in my portfolio
Honestly, as a person who loves to build, the second option was a no-brainer. Plus, one of the biggest drawbacks of Substack is the lack of customization. So, I decided to build my own blog.
In this post, I won’t go over the specific details of “how” to build a blog with Astro. There are plenty of amazing resources out there. The ones that helped me the most were
Instead, I will go over my file structure, code component, open graph images, and design of my blog.
File structure
On the blog level, I have three main files.
post.md- a single blog post (markdown file)MainLayout.astro- template for a blog postblog.astro- displays a list of blog posts
post.md
One of the best parts about Astro supports Markdown files. Also, you can include frontmatter on top of your markdown. Here is the frontmatter for my previous post.
---
layout: ../../layouts/MainPost.astro
title: 'How I built my new portfolio'
description: "Deep dive into the design and code"
date: 'April 23, 2024'
tags: ['design', 'successes']
thumbnail: /images/blog/02-portfolio/thumbnail.jpg
---
Think of frontmatter as data that you can use. The benefit is that you can access these in your layout template. In this case, it’s my MainPost.astro file.
MainPost.astro
This astro file is a template for all my blog posts. This is where frontmatter really shines. I can display frontmatter.title and frontmatter.date , and it’ll do that for all my posts.
The <slot /> is where my blog content goes. Lastly, I added a subscribe section with a substack embed at the end of each post.
---
const { frontmatter } = Astro.props;
import MainLayout from '../layouts/MainLayout.astro';

---
<MainLayout title={frontmatter.title} description={frontmatter.description} thumbnail={frontmatter.thumbnail}>
    <main class="blog-post">
        <h1>{frontmatter.title}</h1>
        <!-- <h5>{frontmatter.date}</h5> -->
        <slot />

        <section class="subscribe">
            <h4>Want to stay updated?</h4>
            <p>
                Subscribe to my newsletter to get the latest updates on new blog post and cool design finds!
            </p>
            <iframe src="https://guochen.substack.com/embed" width="100%" height="320px" style="border:1px solid #EEE; background:white; border-radius: var(--border-radius-medium); margin-top: 1rem;" frameborder="0" scrolling="no"></iframe>
        </section>
    </main>
</MainLayout>
blog.astro
In this astro file, I display a list of blog posts. To do this, I generate an array of blog posts called allPosts using Astro.glob(). Then, since I titled my blog posts “00-Name,” I iterated through all of them reversely. This ensures that the most recent post (the highest number) will be displayed first.
For each iteration, I display the title and date of the blog post. After iterating over the entire array, all the blog posts will be displayed. Here is the code below:
---
//component imports
import MainLayout from '../layouts/MainLayout.astro'
const {frontmatter} = Astro.props;
const allPosts = await Astro.glob('../pages/blog/*.md');

---

<MainLayout title="Blog" description='My Blog' thumbnail="/images/og-img.jpg">
  <main class="blog">

    <h1>Blog</h1>
    <ul class="blog-list">
      {allPosts.reverse().map((post) =>
        <li class="blog-row">
          <a href={post.url}>{post.frontmatter.title}</a>
          <p>{post.frontmatter.date}</p>
        </li>)
      }
    </ul>

  </main>
</MainLayout>
Astro code block
One of the big additions to my blog is code blocks. At first, I was worried that it would be hard to add them to my content. And I have to say:
Substack’s code block looks bad.

But, Astro saves the day with its built-in syntax highlighting. I was blown away by how easy it is. There are only 2 steps.
Step 1 - Add this code to your astro.config.mjs
import { defineConfig } from 'astro/config';

// https://astro.build/config
export default defineConfig({
    markdown: {
      shikiConfig: {
        // Choose from Shiki's built-in themes (or add your own)
        // https://shiki.style/themes
        theme: 'dracula',
        // Add custom languages
        // Note: Shiki has countless langs built-in, including .astro!
        // https://shiki.style/languages
        langs: [],
        // Enable word wrap to prevent horizontal scrolling
        wrap: true,
        // Add custom transformers: https://shiki.style/guide/transformers
        // Find common transformers: https://shiki.style/packages/transformers
        transformers: [],
      },
    },
});
Step 2 - Add ``` + specify your language in markdown
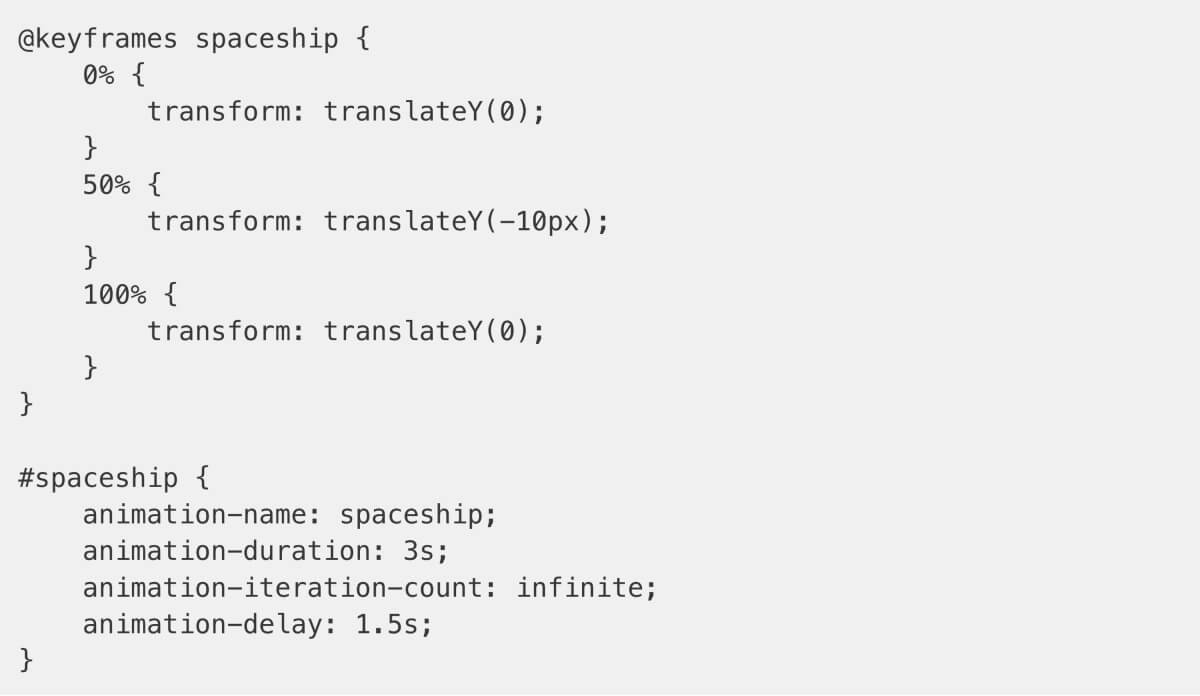
It’s that simple. And it looks something like this:

And the result will look like the one below.
const svgItems = document.querySelectorAll('#spaceship, #laptop, #ping-pong, #microphone, #cup, #pencil, #cat, #pencil, #art-palette, #taipei-101, #totoro, #pen-tool');
const tooltip = document.createElement('div');
Incredible.
Open Graph Images
The last part I want to walk through is how I displayed open graph for my blog posts. This was the most challenging part.
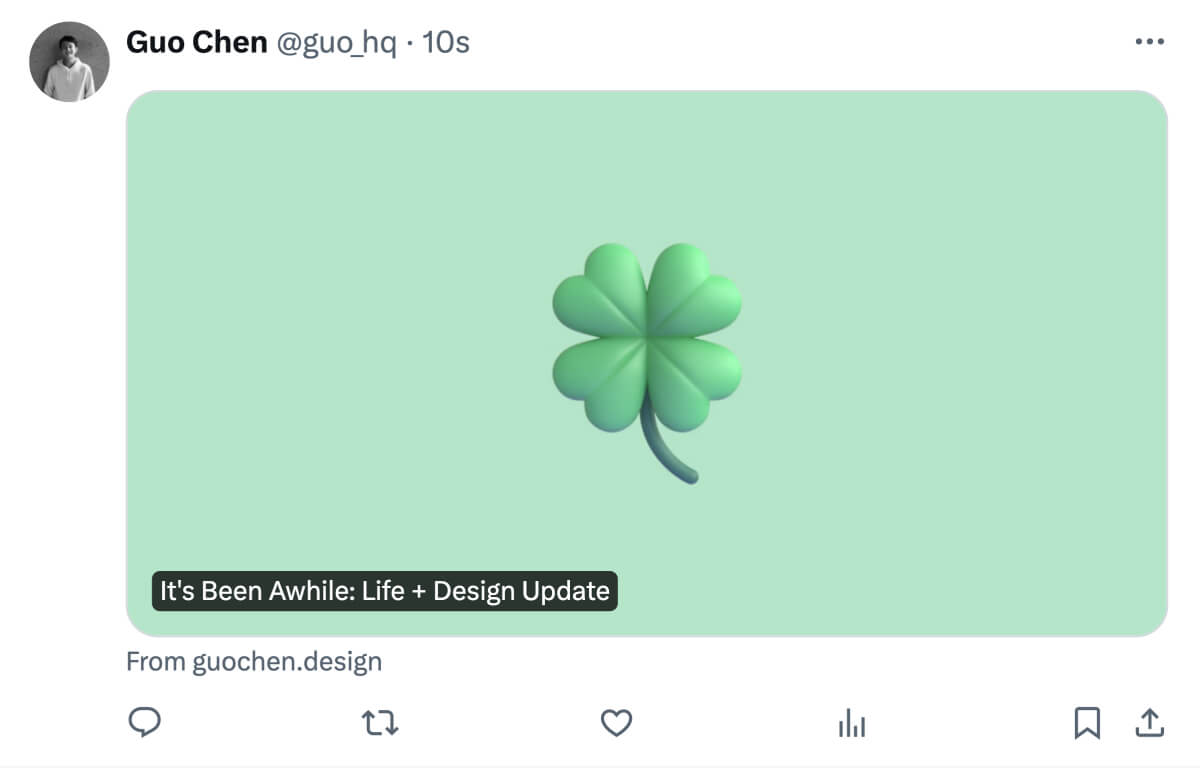
Open graph is a protocol that lets websites control how to display their content on social media. Below is an example.

This was the main reason why I moved away from Substack, so I really wanted to get this right.
At first, I added the standard open graph code in my <head>.
<meta property="og:title" content={title}/>
<meta property="og:description" content={description}/>
<meta property="og:image" content={thumbnail}/>
But, the image preview just won’t show up on Twitter. I searched tons of articles and videos. It just wasn’t working.
Then, I realized there were two problems and fixed them.
Problem 1: My og:image is set up incorrectly
This was my code originally:
<meta property="og:image" content={thumbnail}/>
Turns out, the content needs to be a link to the image. My thumbnail frontmatter was passing over a file structure - /images/blog/02-portfolio/thumbnail.jpg.
So I changed it to the following:
<meta property="og:image" content={`https://www.guochen.design${thumbnail}`}/>
This ensured that the content would point to the right image link. An example is https://www.guochen.design/images/blog/02-portfolio/thumbnail.jpg.
Problem 2: Twitter has a different open graph
For some reason, Twitter likes to be different. There was a separate code I needed to add to show the open graph images on Twitter.
I only realized that after digging through the internet and learning about Twitter Cards. The type I was looking for is a “Summary Card with Large Image.”
So, I added this code to my <head>.
<meta name="twitter:card" content="summary_large_image">
<meta name="twitter:title" content={title}/>
<meta name="twitter:description" content={description}/>
<meta name="twitter:image" content={`https://www.guochen.design${thumbnail}`} />
And it finally worked!

Design
For the longest time, I’ve always wanted to have a text-only blog page. Some of my favorites are Brian Lovin, Emil Kowalski, Catt Small, Ben Borgers, Cap Watkins, etc.
Also, for reference, this was my previous blog’s design:

And now, this is the new design:

It’s quite the departure from my previous blog aesthetic. You may like that one better. But personally, at this stage, I prefer the calmness and simplicity of the new blog.
Putting it all together
My new blog is live! I’m really happy with the result. And this motivates me to write more because now the blog looks the way I like.
Newsletter
I share new posts, designs, and cool inspirations.